Step by Step Guide on Removing and Installing Bathtub
It may be worthwhile to invest in a high-quality bathtub so that you won’t have to repeat the procedure for another 15 to 20 years. And, if you prefer to do it yourself, here is a guide on how to remove and install the bathtub.
There is a very much tough time to remove the bathtub on your own. Before you begin, take a measurement of the tub to ensure that it will fit through the entrance and past other fixtures.
How to Remove an Old Bathtub?
It’s always time to replace an old or worn-out bathtub. In the majority of cases, you can buy a conventional bathtub replacement from your local home store and have it installed by professionals like MaxHome who is very best at the bathroom remodel Tallahassee. Here are some steps for the removal of the old Bathtub.
Step 1: Disconnect the bathtub drain
Remove the overflow cover plate by unscrewing it from the interior of the tub. If there is a drain assembly connected to it, you should remove it. If there is a mounting bracket, unscrew it and pull it out of the way.
Step 2: Disconnect the drainage system
In the event that you have to remove a screw or two in order to disconnect the drain and remove the strainer, it is conceivable that you will need to do so. A strainer wrench is required to remove the drain flange.
Step 3: Disconnect the waste and overflow pipes
Insert an access panel under the tub or a hatch on the floor below the tub in order to disconnect the waste-and-overflow (WO) unit from the drain line. You will need to either loosen a slip nut or unscrew screws if you are using a hub-less connection in your installation.
Step 4: Disassemble the tub spout and tile surround
Install the tub spout on the ceiling, while leaving the wall around the tub at a height of 8 inches. If the handles of the tub faucet are at least 8 inches above the tub, keep them in place. Using a flat pry bar or putty knife can help you remove tiles off the wall.
Step 5: Pry the Tub Away
Remove any nails or screws that are holding the tub flange to the studs by prying them out or unscrewing them. A utility knife may be used to shave away any caulk that may be present where the tub sits on the floor if there is any. Pry the tub away from the rear wall by using a crowbar to pry it an inch or two.
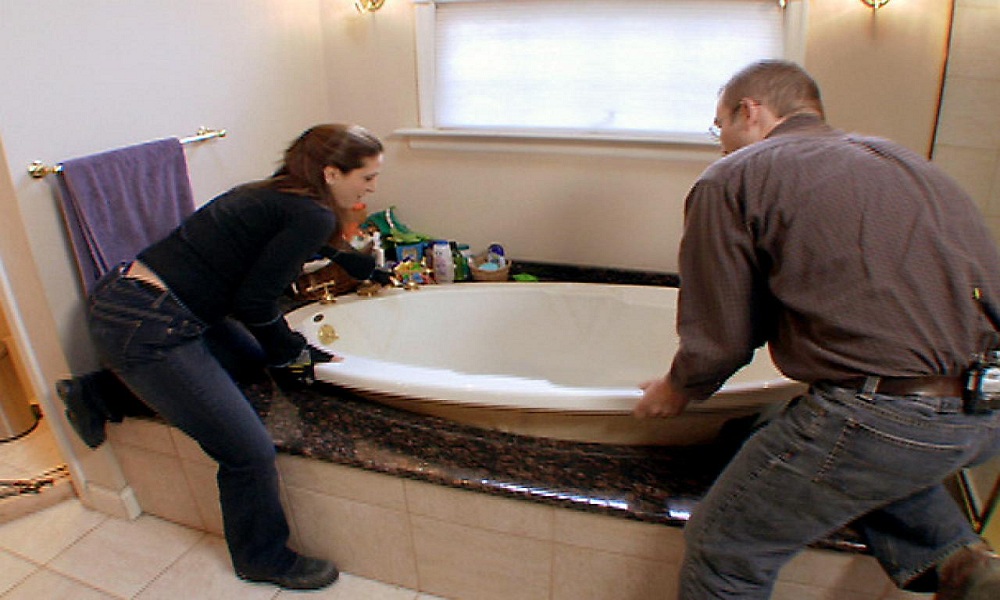
Step 6: Raise and Lower the Tub
The bathtub will fit closer to the studs on either side of the aperture on each side whether it is an old-fashioned claw-foot tub or another kind of stand-alone bathtub. So, unless you cut away the surface of the wall on all sides, you’ll be unable to move it.
Typically, lifting the tub from one end is the most effective method. To open the tub, use a crowbar first, followed by 2x4s to pry it open from one end. Working with a partner, raise the tub to its upright position and slide it out.
How to install a New Bathtub?
Having removed the old tub, you will be able to begin installing the new one immediately. To learn how to build a bathtub, follow these step-by-step instructions from beginning to end.
Step 1: Inspect the Drainage System
Check the drain for damage and replace any broken or missing components. If you notice any issues, it’s important to enlist the services of a qualified Plumber to replace the damaged or missing components. Also, before proceeding with the replacement, refer to the manufacturer’s documentation for specific guidelines and recommendations. Taking accurate measurements is crucial to ensure that the new drain is installed correctly in its designated location.
Step 2: Dry fit your tubes
Fitting the overflow tube and the shoe while the tub is on its side is easier when done this way. First, do the necessary cuts. Afterward, make all connections permanent. The linkage should be positioned below the overflow hole and the gasket should be placed on top of the overflow flange.
Step 3: Include the Overflow Trim in your design
Insert the screws into the overflow trim from the inside of the tub. Once you’ve positioned the overflow flange, hand-tighten one of the screws to secure it in place. To verify that they are both secure, attach the second screw and tighten both using a screwdriver.
Step 4: Place the Shoe Tube in the Shoes
Pump up the overflow tube till the shoe tube fits within it. Reach into the drain hole and insert the other end of the hose.
Step 5: Screw the Flange into place
Underneath the strainer or drain flange, place a piece of plumber’s putty in a rope formation and let it cure overnight. When fastening the flange, hold the shoe in place with one hand and tighten the screw with the other. Using a strainer wrench, tighten the bolts at the specified torque. Using a plastic putty knife scrape away any excess putty that has been squeezed out.
Step 6: Raise and Lower the Tub
The bathtub will fit closer to the studs on either side of the aperture on each side whether it is an old-fashioned claw-foot tub or another kind of stand-alone bathtub. So, unless you cut away the surface of the wall on all sides, you’ll be unable to move it.
Typically, lifting the tub from one end is the most effective method. To open the tub, use a crowbar first, followed by 2x4s to pry it open from one end. Working with a partner, raise the tub to its upright position and slide it out.
Step 7: Leave it to the Professionals
Removing a bathtub is no easy task. If you find yourself struggling despite following all the steps, it’s best to call in a professional who specializes in bathtub replacement. These experts have the experience and tools to remove the tub safely and efficiently, without causing damage to your bathroom or plumbing.
They can also handle the disposal of the old bathtub and assist with the installation of a new one, ensuring everything is properly fitted and functional. By bringing in a professional, you save yourself time, effort, and the potential frustration of dealing with unexpected issues during the process.
Step 8: Install Tile Surrounding the Bathtub
Cut and install strips of cement backer board above the tub to fill the space above the tub, which is more moisture-resistant than green drywall. Install the tiles according to their dimensions, let the glue cure for a day, and then grout them. In the area where the tiles meet the tub, use silicone or tub-and-tile caulk.